
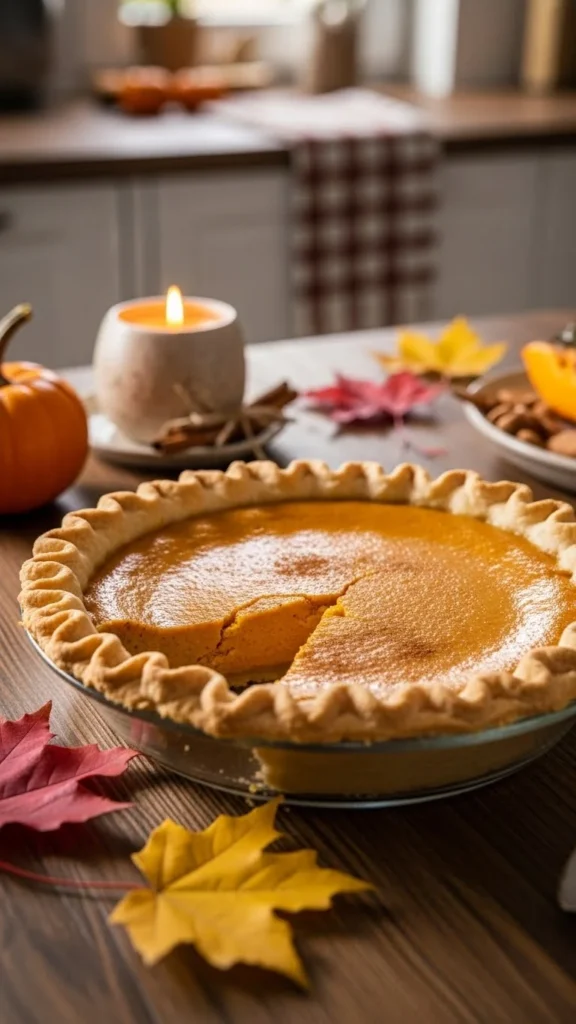
How to Make Pumpkin Pie That Steals the Show
Pumpkin pie isn’t just a dessert—it’s a moment. It’s the dish everyone secretly judges, compares, and hopes will be the one they remember. A silky filling, warm spices, and a crust that actually holds together can turn a simple pie into the star of the table.
The good news? You don’t need fancy techniques or professional tools to make a pumpkin pie that steals the show. You just need the right steps, smart tips, and a little confidence.
What Makes a Pumpkin Pie Truly Memorable?
A great pumpkin pie balances three things perfectly:
- Creamy, smooth filling (never grainy or watery)
- Warm, well-rounded spice flavor (not overpowering)
- A flaky, sturdy crust that doesn’t get soggy
When all three come together, every slice looks beautiful and tastes unforgettable.
Ingredients You’ll Need (And Why They Matter)
Pumpkin pie relies on simple ingredients, but quality and balance are key.
For the filling
- Pumpkin purée (not pumpkin pie filling)
- Eggs (for structure and richness)
- Brown sugar or a mix of brown + white sugar
- Heavy cream or evaporated milk
- Cinnamon, ginger, nutmeg, and cloves
- Vanilla extract
- Pinch of salt
For the crust
- All-purpose flour
- Cold butter
- Ice-cold water
- Salt
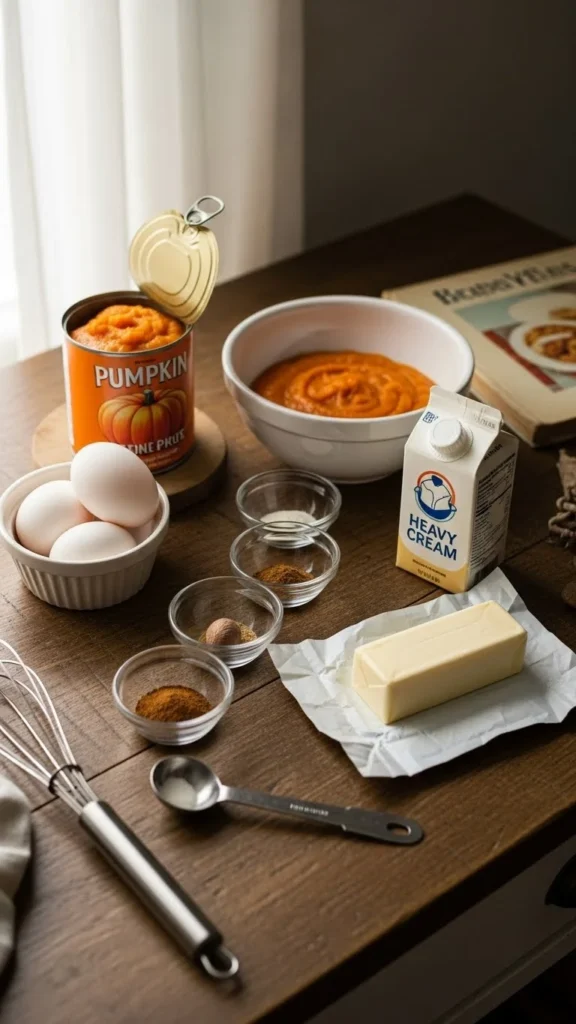
👉 Pro tip: If you have time, homemade pumpkin purée adds deeper flavor, but high-quality canned purée works beautifully too.
Step 1: Prepare a Flaky, Foolproof Crust
A pumpkin pie can only be as good as its crust.
Crust tips that actually work
- Keep butter very cold
- Don’t overwork the dough
- Chill the dough for at least 30 minutes
Roll the dough out gently and fit it into your pie dish. Crimp the edges for a polished look.
Before adding the filling, blind bake the crust for 10–12 minutes. This helps prevent sogginess later.

Step 2: Mix a Silky-Smooth Pumpkin Filling
This is where pumpkin pie wins or loses.
In a large bowl:
- Whisk eggs until smooth
- Add pumpkin purée and sugars
- Stir in cream, vanilla, spices, and salt
Mix just until combined. Overmixing adds air, which can cause cracks during baking.
Spice balance tip
If you want a richer, more complex flavor:
- Use more cinnamon
- Go lighter on cloves
- Add a tiny pinch of black pepper for warmth
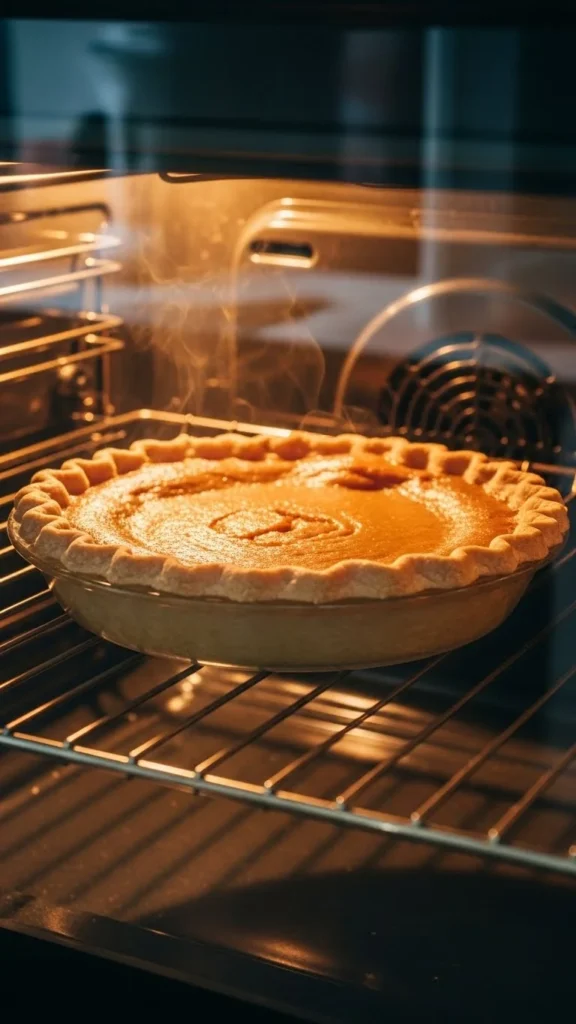
Step 3: Bake It Just Right (No Cracks!)
Pour the filling into the pre-baked crust. Smooth the top gently.
Bake at 350°F (175°C) for about 45–55 minutes.
You’ll know it’s done when:
- The edges are set
- The center jiggles slightly (like gelatin, not liquid)
Turn off the oven, crack the door, and let the pie cool gradually. This helps prevent cracking.
Step 4: Cool, Chill, and Let the Flavor Shine
Pumpkin pie needs time to set properly.
- Cool at room temperature for 2 hours
- Refrigerate for at least 2 more hours before slicing
This resting time improves both texture and flavor.
Rushing this step is the most common mistake—and the easiest one to avoid.
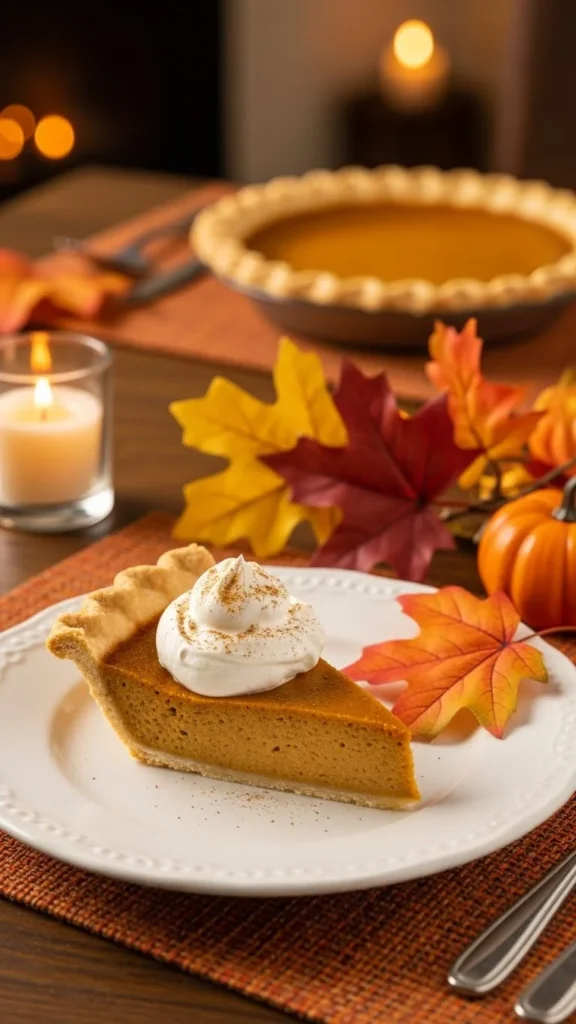
How to Make Your Pumpkin Pie Look Show-Stopping
Presentation matters, especially if you’re serving guests.
Easy upgrades:
- Decorative crust edges or cut-out leaves
- A dusting of cinnamon or nutmeg
- Whipped cream piped around the edge
- A dollop of cream in the center
Storage & Make-Ahead Tips
Pumpkin pie is a great make-ahead dessert.
- Make it 1 day in advance for best flavor
- Store covered in the fridge for up to 4 days
- Avoid freezing once baked (texture suffers)
If needed, you can freeze the unbaked crust ahead of time.
Final Takeaway
Pumpkin pie that steals the show isn’t about being fancy—it’s about nailing the basics. A flaky crust, creamy filling, balanced spices, and proper baking time make all the difference.
Once you master this method, you’ll never stress about pumpkin pie again.
🎃 Save this recipe for later, and pin it now so you’re ready when pumpkin season calls!

Leave a Reply