
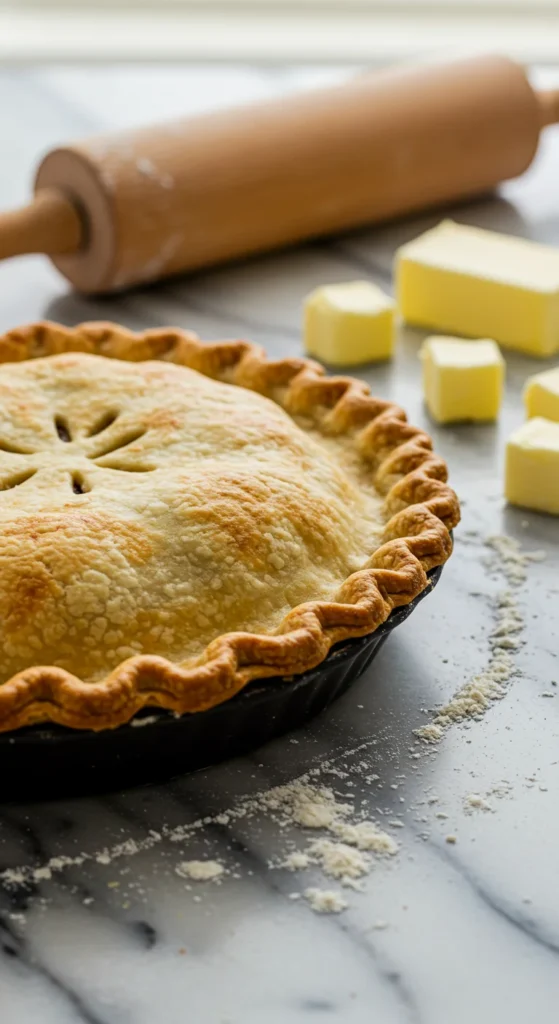
A flaky, buttery pie crust is the foundation of every great pie — the kind that shatters delicately when you cut into it and melts on your tongue. But let’s be honest: homemade crust can feel intimidating. Too dry, too tough, or too crumbly, and it’s easy to think the store-bought stuff is safer.
Here’s the truth: you can make a perfect pie crust every time with a few smart tricks and the right touch. Once you master this technique, you’ll never look back — promise.
Step 1: Gather Simple Ingredients
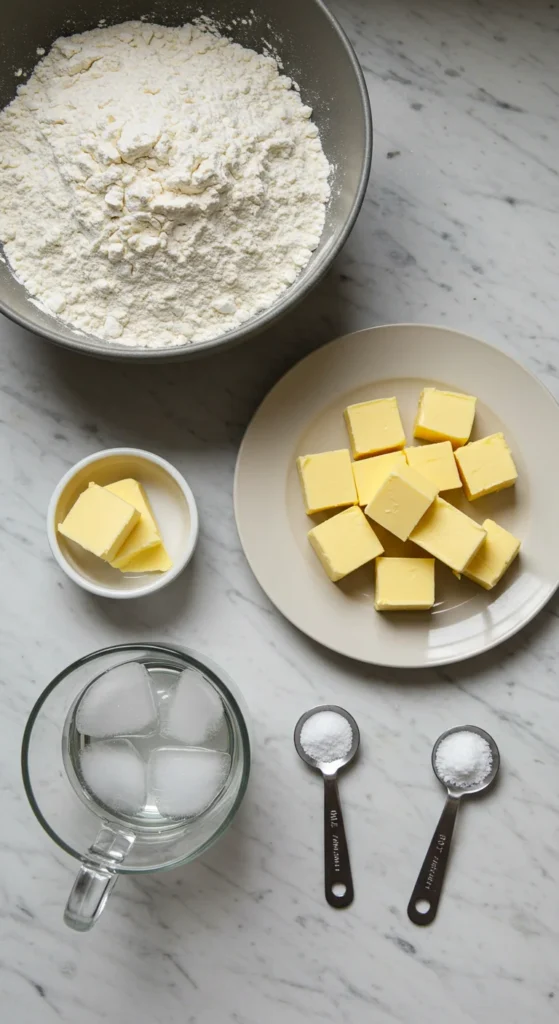
You don’t need anything fancy — just five pantry basics:
- 2 ½ cups all-purpose flour
- 1 tsp salt
- 1 cup (2 sticks) cold unsalted butter, cut into cubes
- 6–8 tbsp ice water
- 1 tsp vinegar or lemon juice (optional but helps tenderness)
That’s it. The secret isn’t in the ingredients — it’s in how cold they are and how gently you handle them.
Step 2: Keep Everything Cold
Flaky crust happens when cold butter melts during baking, creating steam that separates layers of dough. Warm butter blends in too much and turns the crust dense.
Here’s how to keep it chill (literally):
- Chill your butter, flour, and even your mixing bowl before starting.
- Work quickly to avoid warming the dough with your hands.
- If your kitchen’s warm, pop everything in the fridge for a few minutes between steps.
Pro Tip: Some bakers even freeze their butter cubes for 10 minutes before mixing — it makes a big difference.
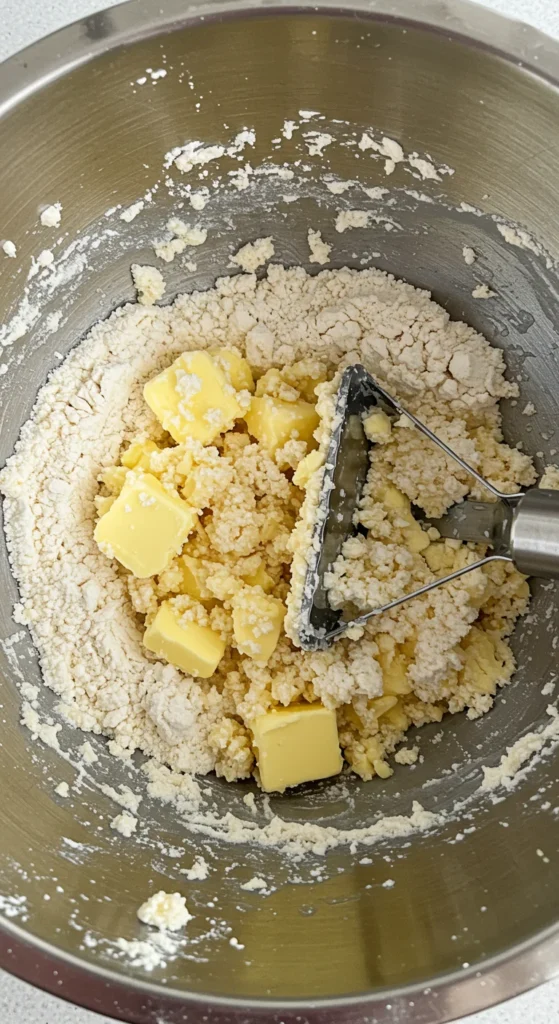
Step 3: Cut in the Butter
Add cold butter cubes to the flour and salt mixture. Then, use a pastry cutter, two forks, or even your fingertips to break the butter into the flour until it forms pea-sized bits.
Those uneven chunks of butter are what make the crust flaky, so resist the urge to over-mix. You should still see visible bits of butter throughout the dough.
Step 4: Add Ice Water Slowly
Sprinkle in ice-cold water, one tablespoon at a time, tossing gently with a fork after each addition. Stop as soon as the dough just starts to come together when pinched — it should look shaggy, not sticky.
Too much water makes the crust tough, so err on the side of less. You can always add another spoonful if needed.
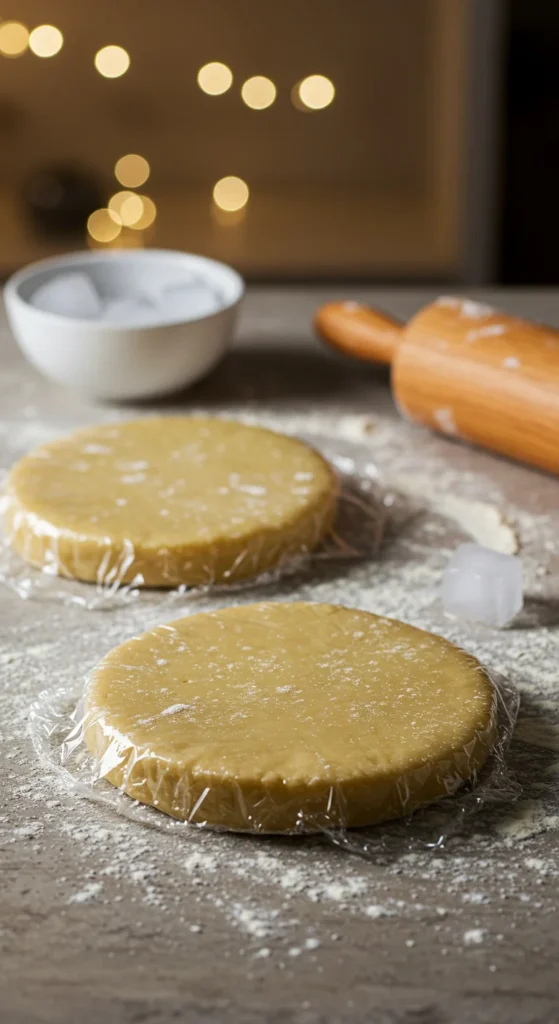
When it holds together, turn the dough onto a lightly floured surface and gently press it into a ball. Don’t knead — that builds gluten and toughens the crust.
Split the dough into two discs, wrap them in plastic, and chill for at least 30–60 minutes.
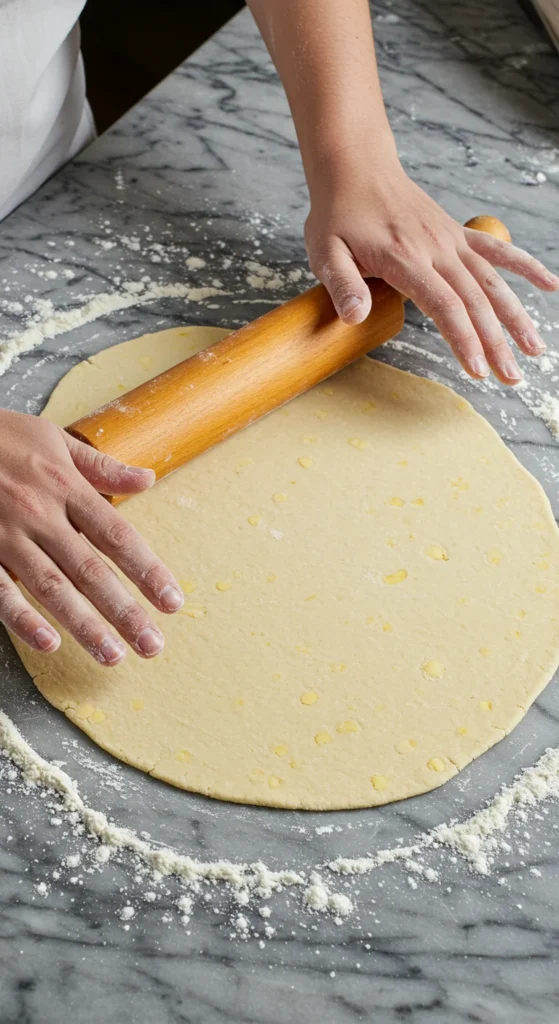
Step 5: Roll It Out Like a Pro
Once the dough has chilled, take out one disc and let it rest for 5 minutes to soften slightly before rolling.
Lightly flour your surface and rolling pin. Start from the center and roll outward, rotating the dough a quarter turn after every few rolls to keep it even and circular.
If cracks form, gently patch them by pressing the dough together — no stress!
Pro Tip: Roll the dough a couple of inches larger than your pie dish so it has enough overhang for crimping later.
Step 6: Transfer & Trim
Carefully drape the dough over your pie plate by loosely rolling it around the pin, then unrolling it over the dish. Gently press into the bottom and sides without stretching.
Trim any excess to about a 1-inch overhang. Fold it under itself along the rim and crimp with your fingers or a fork for a classic edge.
For a baked-filling pie (like pecan or pumpkin): Chill again before filling to prevent shrinking.
For a pre-baked crust (like cream pies): Prick the bottom with a fork, line with parchment, fill with pie weights or dried beans, and bake at 375°F (190°C) for 15–20 minutes.
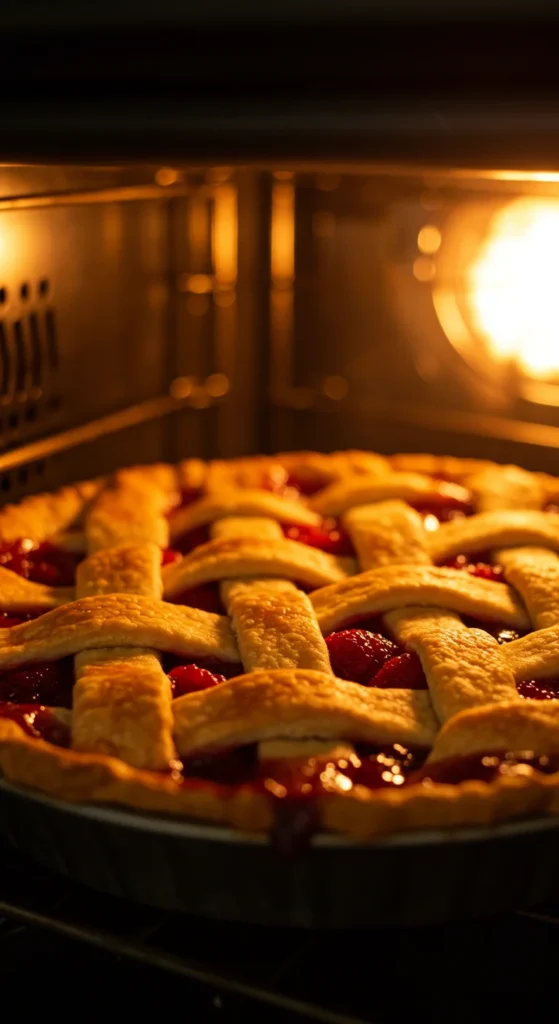
Step 7: Bake Until Golden
For a double-crust pie, add your filling, cover with the second crust, and cut a few vents on top for steam. Brush with beaten egg or milk for shine and sprinkle with sugar for sparkle.
Bake according to your recipe — most pies need 45–60 minutes at 375°F. Rotate halfway through for even browning.
Step 8: Cool, Slice & Enjoy
Once baked, let your pie rest for at least 2 hours. Cooling helps the filling set and prevents sogginess.
Then slice, serve, and watch those flaky layers reveal themselves — buttery, tender, and crisp all at once.
Bonus Tips for Foolproof Flakiness
- Use part shortening or lard: A 50/50 mix with butter adds extra structure.
- Avoid over-handling: The less you touch it, the flakier it stays.
- Freeze before baking: Ten minutes in the freezer helps hold shape and prevents shrinkage.
- Try vinegar or vodka: A tablespoon helps inhibit gluten, keeping your crust tender.
The Sweet Takeaway 🥧
A never-fail flaky pie crust is all about balance — cold ingredients, light hands, and patience. Once you’ve got it down, you can fill it with anything: apple, pecan, pumpkin, or savory pot pie.
There’s nothing like pulling your own golden crust from the oven, knowing you made it from scratch.
Save this recipe for your next baking day — your pies will thank you.

Leave a Reply