
No ice cream maker? No problem! You can still create smooth, creamy, and totally irresistible ice cream right at home — using just a few simple ingredients and tools you already have. Whether you’re craving classic vanilla, rich chocolate, or something fruity and fun, this no-churn method gives you that dreamy scoopable texture without any fancy equipment.
The Magic Behind No-Churn Ice Cream 🍨
Traditional ice cream machines churn air into the mixture to make it creamy — but guess what? We can mimic that same magic with whipped cream and sweetened condensed milk!
You’ll Need:
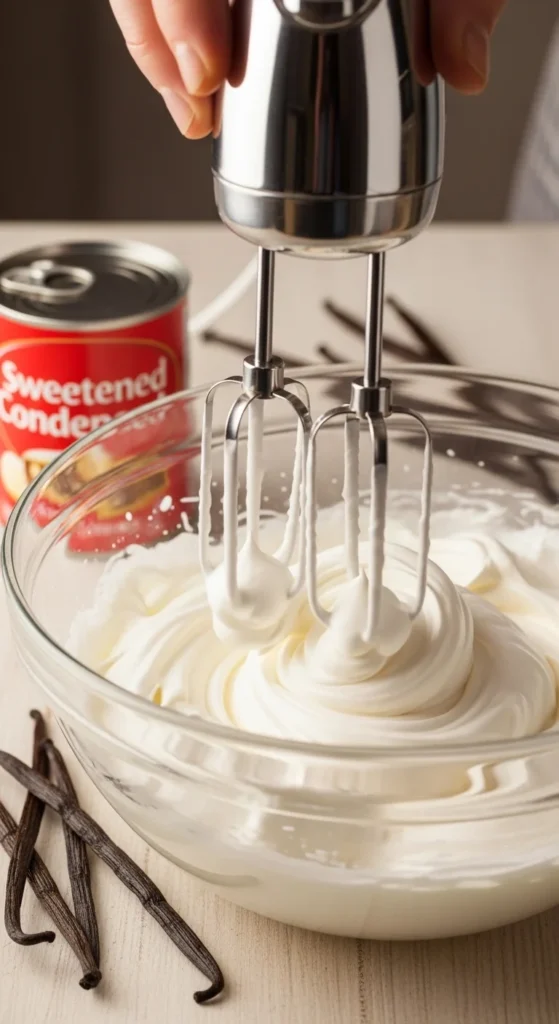
- 2 cups heavy whipping cream (cold)
- 1 can (14 oz) sweetened condensed milk
- 1 tsp vanilla extract
- Optional mix-ins: chocolate chips, crushed cookies, fruit puree, caramel swirls, or peanut butter ribbons 😋
💡 Pro tip: Make sure your mixing bowl and beaters are cold — it helps the cream whip faster and fluffier.
Step 1: Whip It Good! 🎂
Pour the heavy cream into a chilled mixing bowl and whip until stiff peaks form. You want it light, airy, and holding shape — kind of like whipped frosting.
This step adds the “churned” texture that gives your ice cream its dreamy creaminess.
Step 2: Mix the Base 🍯
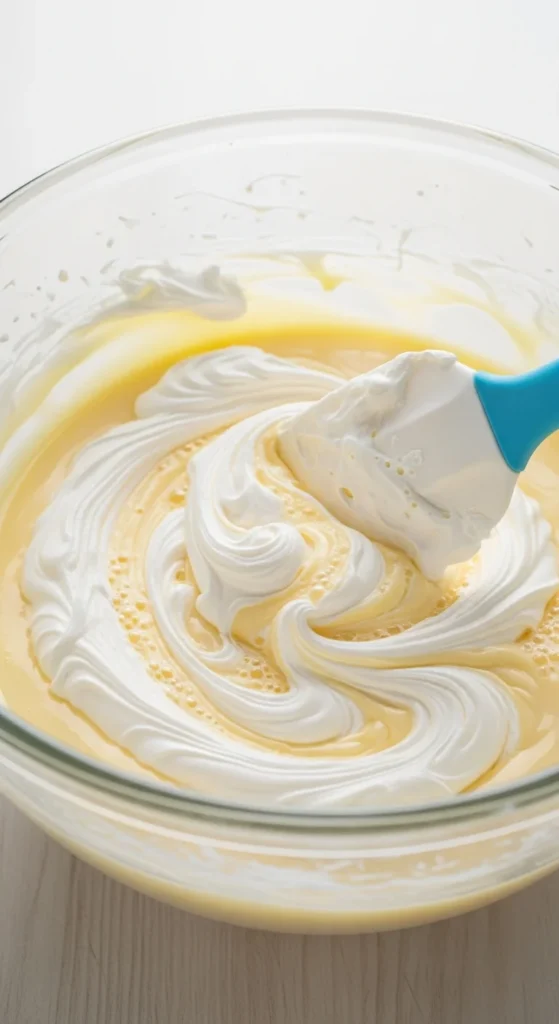
In a separate large bowl, stir together the sweetened condensed milk and vanilla extract.
Then, gently fold the whipped cream into the milk mixture, a little at a time. Don’t stir too hard — you want to keep all that lovely air in the mixture!
At this point, you have a perfect vanilla base ready for mix-ins or flavor twists.
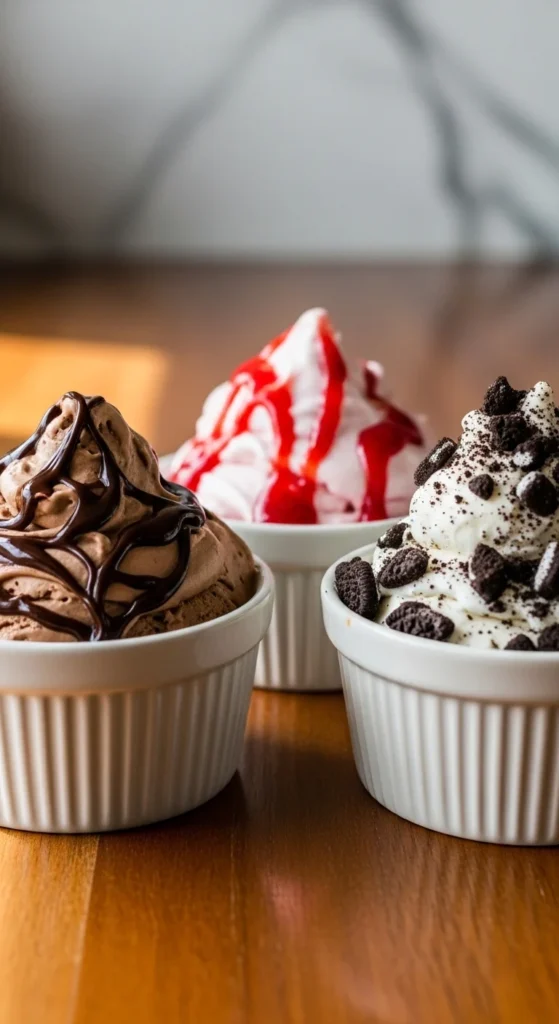
Step 3: Add Your Favorite Flavors 🍫🍓
This is where the fun begins! Customize your no-churn ice cream any way you like:
- Chocolate: Mix in ¼ cup cocoa powder or melted chocolate.
- Cookies & Cream: Fold in crushed Oreos.
- Strawberry Swirl: Layer in strawberry puree or jam.
- Peanut Butter Fudge: Swirl in peanut butter and chocolate sauce.
- Mint Chip: Add peppermint extract and mini chocolate chips.
You can even split the base into halves or thirds to make multiple flavors in one batch.
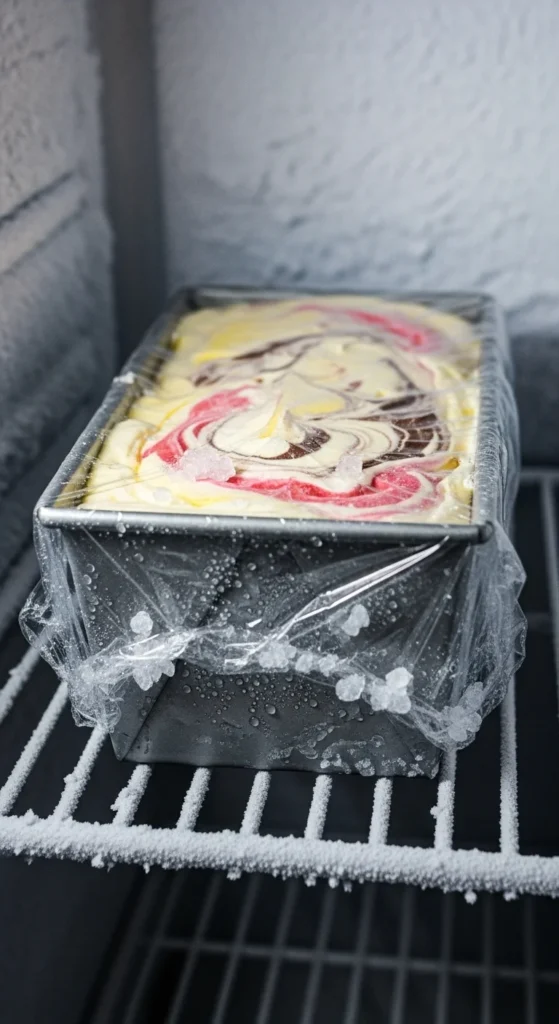
Step 4: Freeze & Wait (the Hard Part!) ❄️
Pour your mixture into a freezer-safe container (like a loaf pan). Smooth the top, cover with plastic wrap, and freeze for at least 6 hours or overnight.
When it’s ready, let it sit on the counter for 5–10 minutes before scooping — this softens it to that perfect creamy consistency.
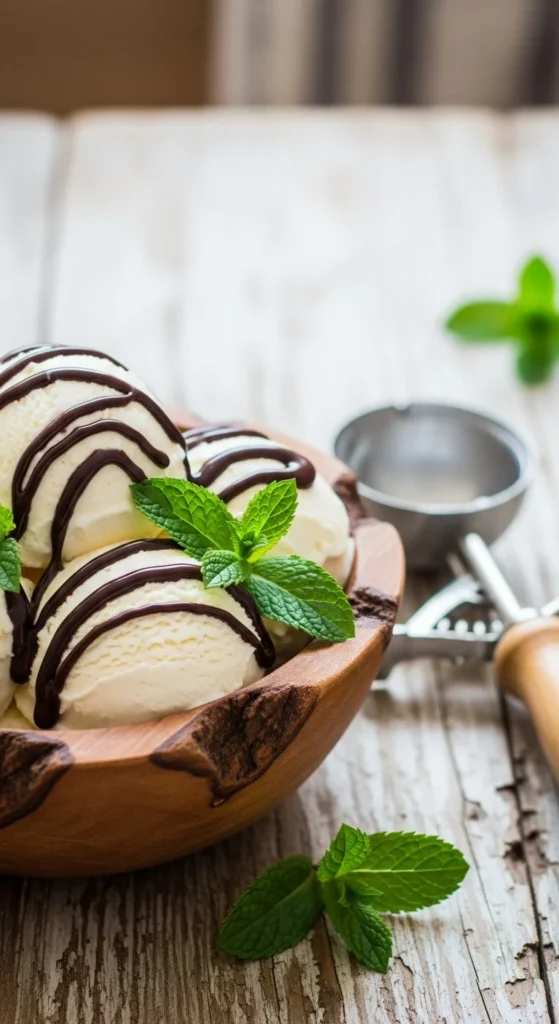
Step 5: Scoop, Serve & Enjoy 🍦
Use a warm ice cream scoop for perfect, Instagram-worthy scoops! Serve in cones, bowls, or even between cookies for homemade ice cream sandwiches.
Top with your favorite extras — chocolate sauce, nuts, sprinkles, or fruit. The possibilities are endless!

Flavor Inspiration Board 🍓🍪🍋
Once you’ve mastered the base, get creative! Try these fun combos:
- Salted Caramel Pretzel Crunch
- Lemon Blueberry Cheesecake
- Mocha Almond Fudge
- Honey Lavender
- Chunky Monkey Banana Nut
Each one starts with the same no-churn method — just swap in your favorite flavors and mix-ins!
The Takeaway 💛
Homemade ice cream doesn’t need to be complicated — just creamy, cold, and full of love. With this no-churn recipe, you can whip up your favorite flavors anytime (no special gadgets required!).
✨ Save this recipe and pin it to your “Summer Desserts” board — your freezer will thank you later! 🍦

Leave a Reply