
If you love rich, chocolatey desserts that look elegant but are secretly simple to make, this one’s for you. A chocolate tart is the ultimate indulgence — silky ganache filling, buttery crust, and a glossy finish that’ll make your dessert table shine. Whether it’s for a dinner party or a cozy night in, this tart delivers major “wow” factor with minimal effort.

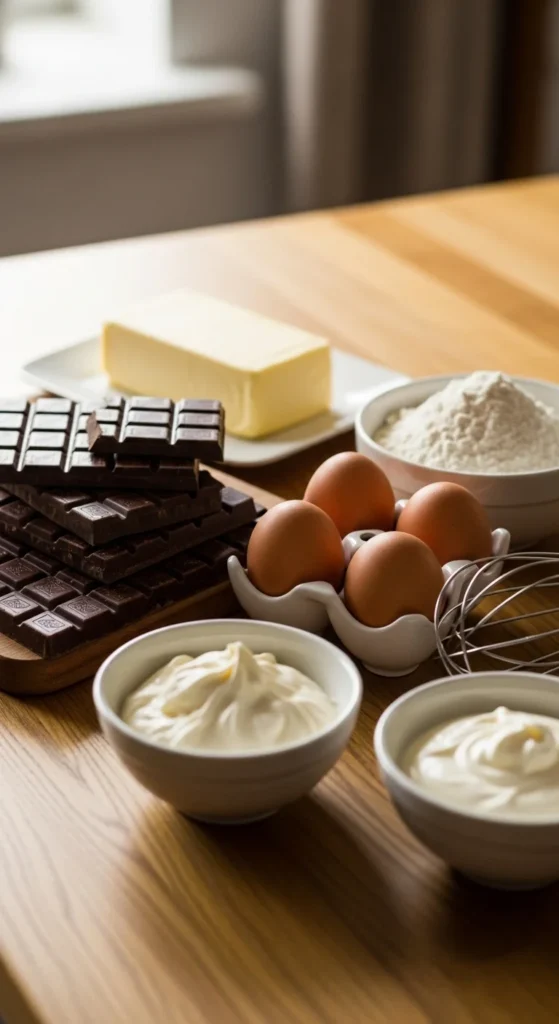
Gather Your Ingredients 🍫🥚🧈
This tart looks fancy, but it’s made from everyday ingredients you probably already have.
For the Crust:
- 1 ¼ cups all-purpose flour
- ½ cup (1 stick) cold butter, cubed
- ¼ cup powdered sugar
- 1 egg yolk
- 1–2 tbsp cold water
For the Filling:
- 8 oz dark or semi-sweet chocolate (chopped)
- ¾ cup heavy cream
- 2 tbsp butter
- 1 tsp vanilla extract
- Pinch of salt
💡 Pro tip: Use high-quality chocolate — it’s the star of the show!
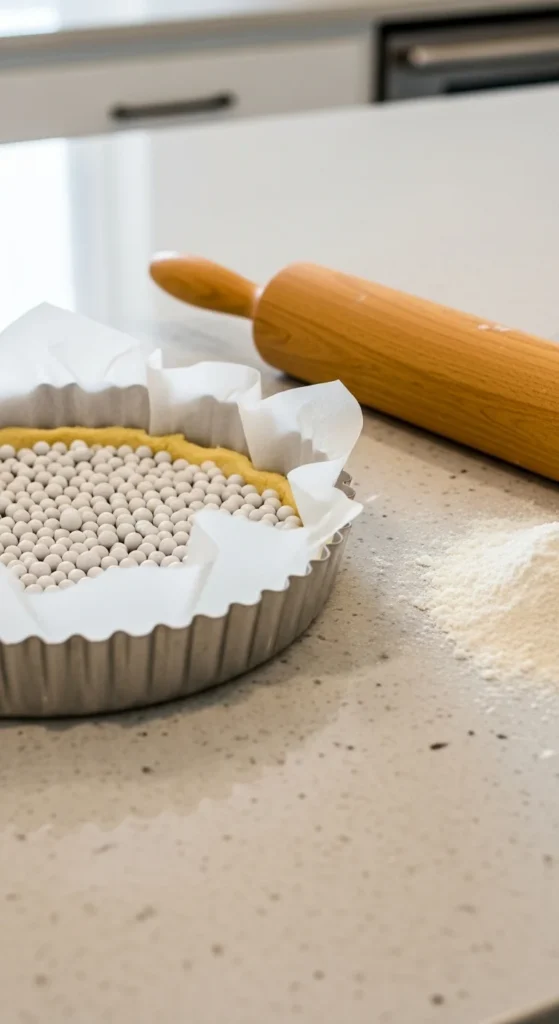
Step 1: Make the Buttery Tart Crust 🥧
A great tart starts with a great base — buttery, crisp, and just a little sweet.
- In a bowl, combine flour and powdered sugar.
- Add cold butter and rub with your fingertips (or use a pastry cutter) until it resembles breadcrumbs.
- Mix in the egg yolk and cold water until the dough comes together.
- Shape into a disc, wrap in plastic, and chill for 30 minutes.
Once chilled, roll the dough out and press it into a 9-inch tart pan. Trim the edges neatly.
- Blind bake: Line the crust with parchment and fill with baking weights or dried beans. Bake at 375°F (190°C) for 15 minutes, then remove the weights and bake 10 minutes more until golden.
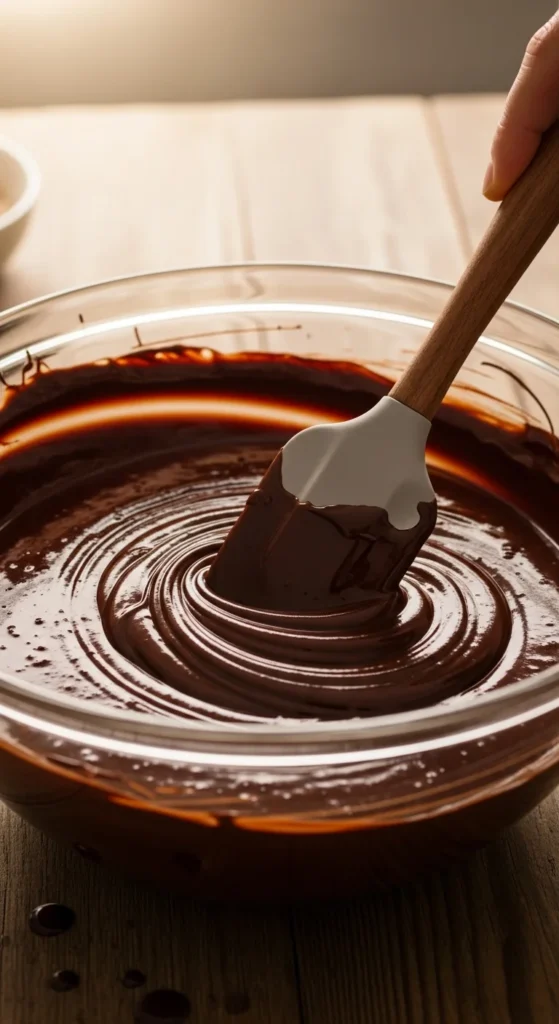
Step 2: Prepare the Silky Chocolate Filling 🍫
While your crust cools, it’s time to make the luscious ganache filling.
- Heat the heavy cream in a small saucepan over medium heat until just steaming — don’t let it boil.
- Pour the hot cream over the chopped chocolate and let it sit for 1 minute.
- Add butter, vanilla, and a pinch of salt, then stir gently until smooth and glossy.
That’s it — no mixer, no fuss, just pure chocolate magic.
Step 3: Assemble & Chill 🍮
Now comes the fun part!
- Pour the warm chocolate ganache into your cooled tart crust.
- Smooth the top with a spatula to get that perfect, mirror-like surface.
- Refrigerate for at least 2–3 hours (or overnight) until fully set.
The result? A sliceable, silky tart that melts in your mouth.

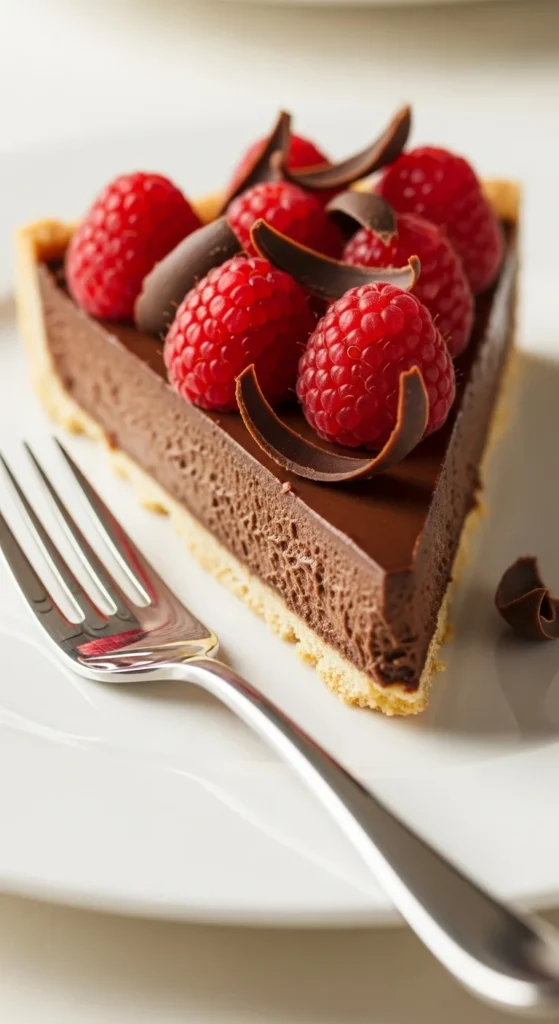
Step 4: Garnish & Serve 🍓✨
Dress up your tart to make it Pinterest-worthy! Try topping with:
- Fresh berries (raspberries or strawberries)
- Whipped cream swirls
- A sprinkle of flaky sea salt
- Chocolate curls or shavings
Slice with a warm knife for clean edges and serve chilled or at room temperature. Each bite is creamy, rich, and dangerously good.
Variations to Try 💡
Once you’ve mastered the classic, experiment a little!
- Salted Caramel Chocolate Tart: Add a thin caramel layer under the ganache.
- Mocha Tart: Stir 1 tsp espresso powder into the cream before heating.
- Nutty Twist: Sprinkle crushed hazelnuts or almonds on top before chilling.
Final Takeaway 🍫💛
This decadent chocolate tart proves that dessert doesn’t have to be complicated to feel luxurious. With its crisp crust and smooth, melt-in-your-mouth filling, it’s sure to become your go-to showstopper for any occasion.
✨ Save this recipe for your next celebration — or just a quiet night when you deserve something truly special! 🍫

Leave a Reply